


Photo by Ian Taylor on Unsplash
Dockerize .NET Framework Application without touching code
Disclaimer: This article shares my personal experience and does not represent the position of AWS or Amazon.


In this post, I'll show you the power of AWS App2Container command line tool. With the help of App2Container tool, you can modernize (dockerize) your .NET and Java application and deploy it to AWS ECS/EKS/App Runner.
If application is not in active development then it is very difficult job to find application dependency and dockerize that application. In this post, I'll lift and shift my .NET Framework application from EC2 to AWS ECS.
What is AWS App2Container?
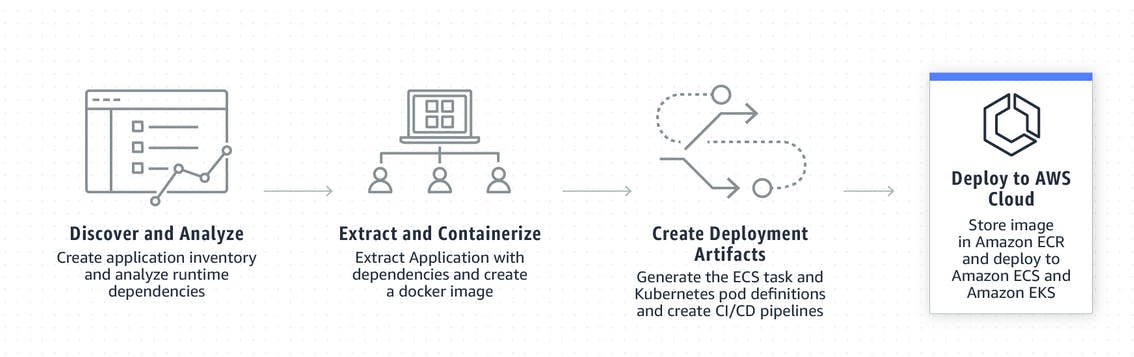
AWS App2Container is command line tool for modernizing .NET and Java application into containerized application. A2C analyzes and builds an inventory of all applications running in virtual machines, on-premises or in the cloud. You simply select the application you want to containerize, and A2C packages the application artifact and identified dependencies into container images, configures the network ports, and generates the ECS task and Kubernetes pod definitions. A2C provisions, through CloudFormation, the cloud infrastructure and CI/CD pipelines required to deploy the containerized .NET or Java application into production. With A2C, you can easily modernize your existing applications and standardize the deployment and operations through containers.
Dockerize .NET Framework Application using App2Container
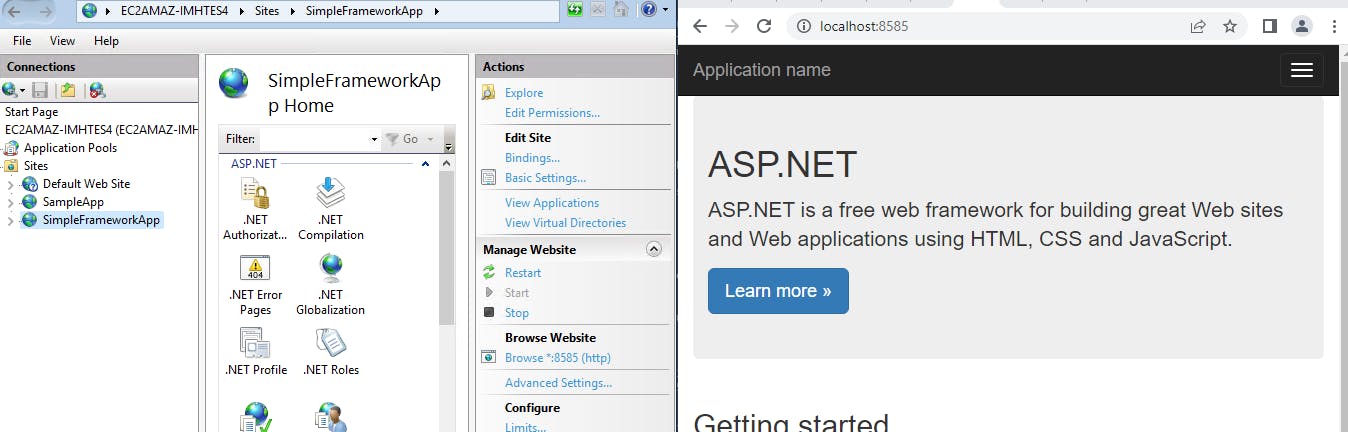
Before starting App2Container, I have setup my legacy .NET Framework application running in IIS on Windows server 2019 with container and I can access my application using port 8585.
Also, I have installed AWS CLI and setup my AWS profile on applications server. Let's start App2Container step by step.
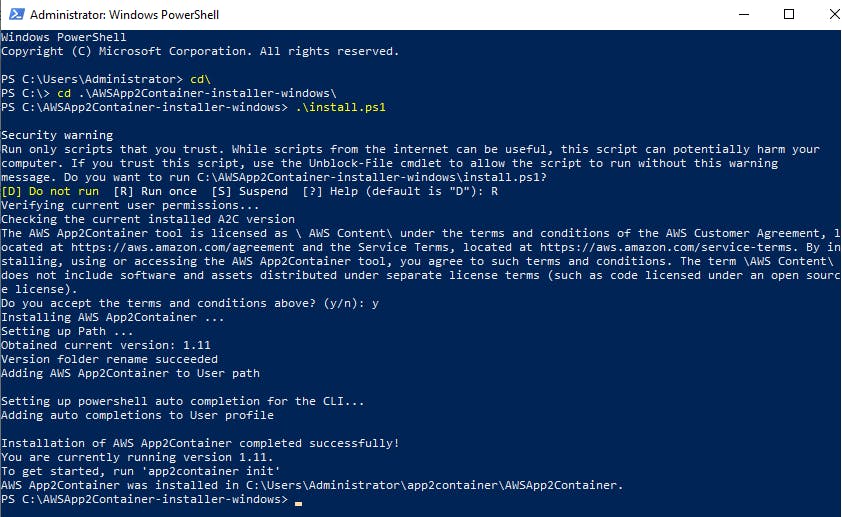
Step 1: Download and Install AWS App2Container
Download the App2Container installation package, AWSApp2Container-installer-windows.zip.
Extract the package and open PowerShell (Run as administrator) on that folder
Run install script from PowerShell
.\install.ps1
Step 2: Initialize AWS App2Container
Initialize AWS App2Container on application server. You are prompted to provide some information. Press "enter" to accept the default value. I have added S3 bucket name, rest of the option taken as default. Run init command as follows app2container init

Step 3: Run AWS App2Container inventory command
Now time to analyze and find running applications on server. Run inventory command as follows app2container inventory. The output includes a JSON object collection with one entry for each application.

Step 4: Analyze your application
To analyze application, we need iis-app-id from previous step. Run analyze command as follows app2container analyze --application-id iis-app-id

The output is a JSON file, analysis.json, stored in the workspace directory that you specified when you ran the app2container init command in step 2.
Step 5: Containerize your application
To containerize application run containerize command as follow app2container containerize --application-id iis-app-id.
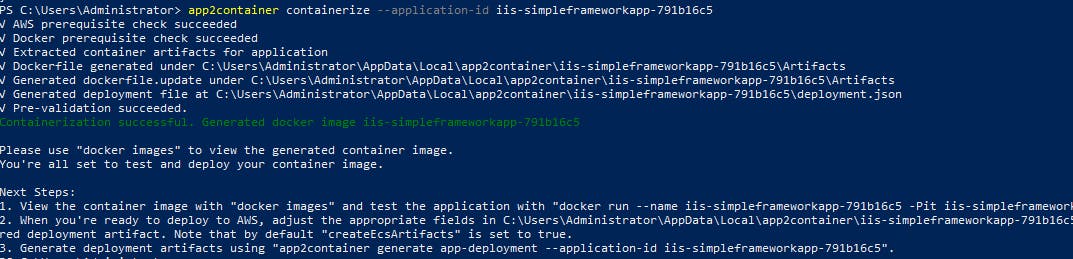
Note: If docker is not installed on your server, you will get an error. Install docker and re-run containerize command.
The output is a set of deployment files stored in the workspace directory that you specified when you ran the app2container init command. before you move to next step, run docker container on application server and verify container working as expected.

Step 6: Deploy your application
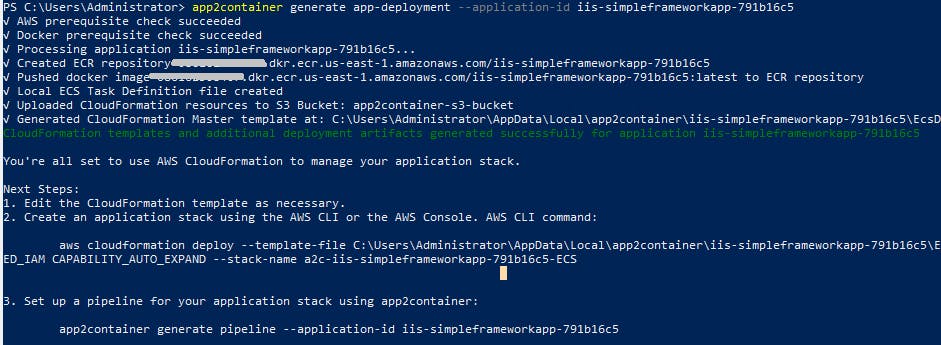
Run the generate app-deployment command as follow app2container generate app-deployment --application-id iis-app-id. This command creates ECR (Elastic Container Registry) on your AWS account and push docker image on that registry. It will upload CloudFormation template on S3 bucket.
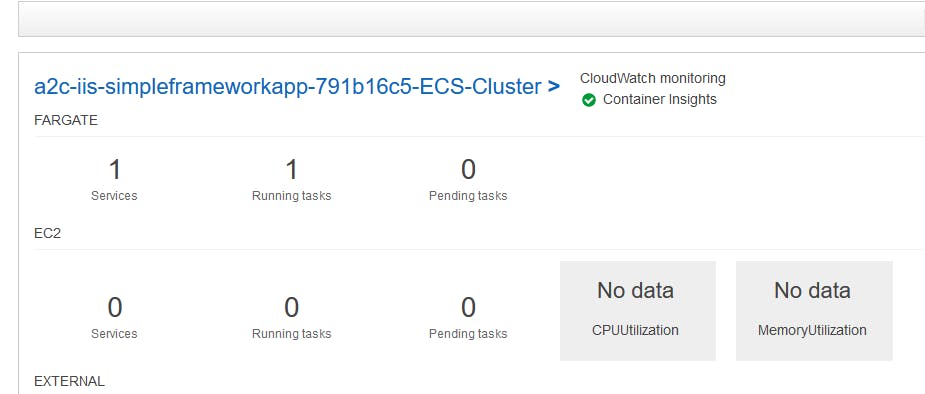
Step 7: Deploy your application on AWS ECS
AWS App2Container generates everything for us, we need to copy CloudFormation command from previous step output window and run in AWS CLI.

Step 8: Verify AWS Resources
AWS CloudFormation template creates all the required resources for the application. We can verify newly created resources from AWS account.
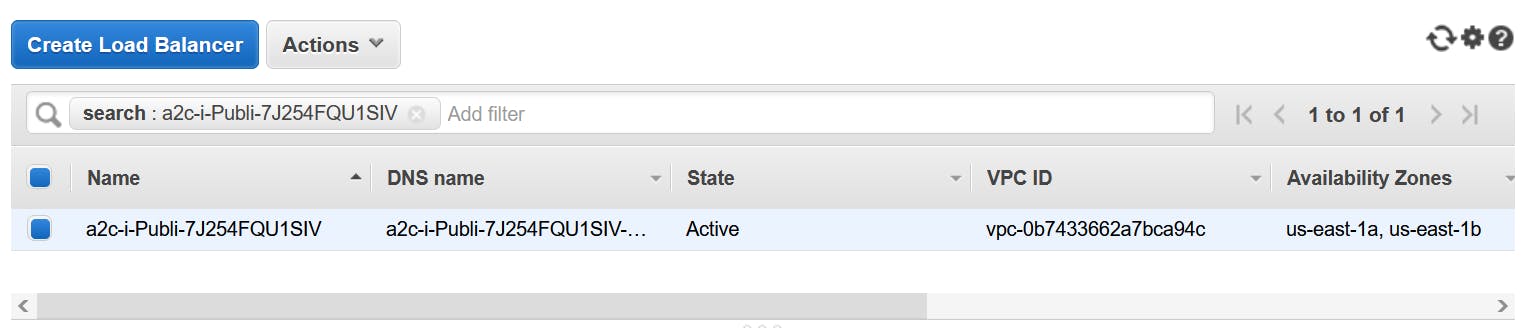
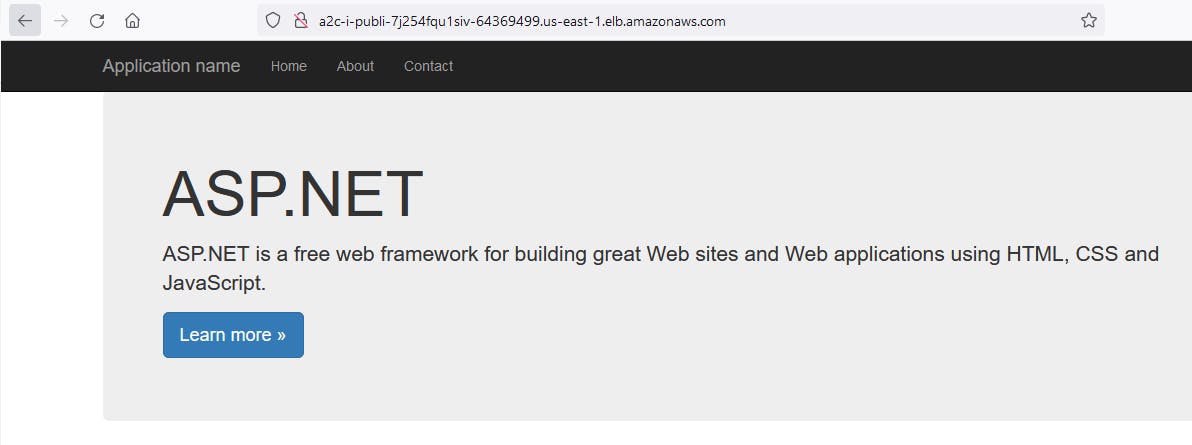
Step 9: Verify Dockerize Application
Access dockerize application through Application Load Balancer.
Conclusion
In this post, I have deployed simple .NET Framework application without any changes on generated dockerize file but you can tweak container image before deployment. Make sure that you are running AWS App2Container on supported operation system. Feel free to share your thoughts in comment section.